A campfire is the soul of any camping adventure, casting a warm glow that invites stories, s’mores, and connection with nature. Whether you’re pitching a tent in a bustling national park or a remote wilderness, knowing how to build a campfire safely and efficiently transforms your outdoor experience.
Our team, with decades of camping across forests, mountains, and lakesides, has crafted this comprehensive guide to teach you campfire building techniques that work in any season—summer’s warmth, winter’s chill, or even on snow-covered ground. Drawing on expertise from sources like the National Park Service and Leave No Trace, we’ll walk you through every step, from selecting a safe location to leaving the site pristine. Let’s ignite your camping journey with a fire that’s safe, sustainable, and unforgettable.
Just a heads up! This post contains some affiliate links, which means I might earn a small commission at no additional cost to you. Thanks in advance for your support!
Why a Campfire Matters
Picture this: a starry night, the crackle of logs, and the scent of woodsmoke as you gather around a campfire with friends or family. Beyond its practical uses—providing warmth, cooking meals, or drying wet gear—a campfire creates moments that linger in memory. Yet, building one comes with responsibility. A single spark can ignite a wildfire, and improper cleanup can scar the landscape. Our team has camped in diverse terrains, from the Smoky Mountains to the Pacific Northwest, learning firsthand the balance between enjoyment and environmental care.
This guide, informed by authoritative sources like the U.S. Forest Service, ensures you master the best way to build a campfire that’s both enjoyable and eco-conscious. By following these steps, you’ll create a fire that enhances your trip while protecting the wilderness for future adventurers.
Choosing the Ideal Campfire Location
The first step in building a campfire is selecting a location that prioritizes safety and environmental protection. A poorly chosen spot can lead to uncontrolled fires or harm to delicate ecosystems, so careful planning is essential. From our years of camping in varied conditions, we’ve learned that a safe location starts with a flat, level surface, ideally a bare patch of dirt or rock, free from flammable materials like dry leaves, grass, or overhanging branches. Keep your fire at least 15–30 feet from tent air mattress, gear, or trees to prevent sparks from causing accidents.
Before lighting a match, check local fire regulations through campsite signage or websites like the U.S. Forest Service, as restrictions are common in dry seasons to prevent wildfires.
Building near water sources, such as rivers or lakes, should be avoided—maintain a 200-foot buffer to protect aquatic ecosystems from ash runoff, a lesson we’ve internalized from camping near pristine lakes.
Wind is another critical factor; a gusty site can scatter embers, so choose a sheltered spot or postpone your fire if winds exceed 15 mph. Scouting your location in daylight, as we’ve done in countless campsites, helps identify hazards and ensures a safer burn.

How to Build or Find a Fire Pit
A fire pit is your campfire’s foundation, containing flames and embers to ensure safety and control. Whether you’re using an existing pit or crafting one from scratch, this step sets the stage for a successful fire.
Using an Existing Fire Pit
Most established campsites offer fire pits, often built with metal rings or stone borders, sometimes equipped with grates for cooking. These pits are designed to meet safety standards, making them ideal for beginners and seasoned campers alike. If the pit is cluttered with old ashes or coals, take a moment to prepare it. Using a sturdy stick or shovel, spread the debris evenly across the pit’s base to create a flat, stable surface. This prevents hot spots that could reignite later and ensures your fire burns consistently. Our team has relied on campsite pits across national parks, finding that a clean base reduces smoke and improves airflow, making your campfire more efficient and enjoyable.
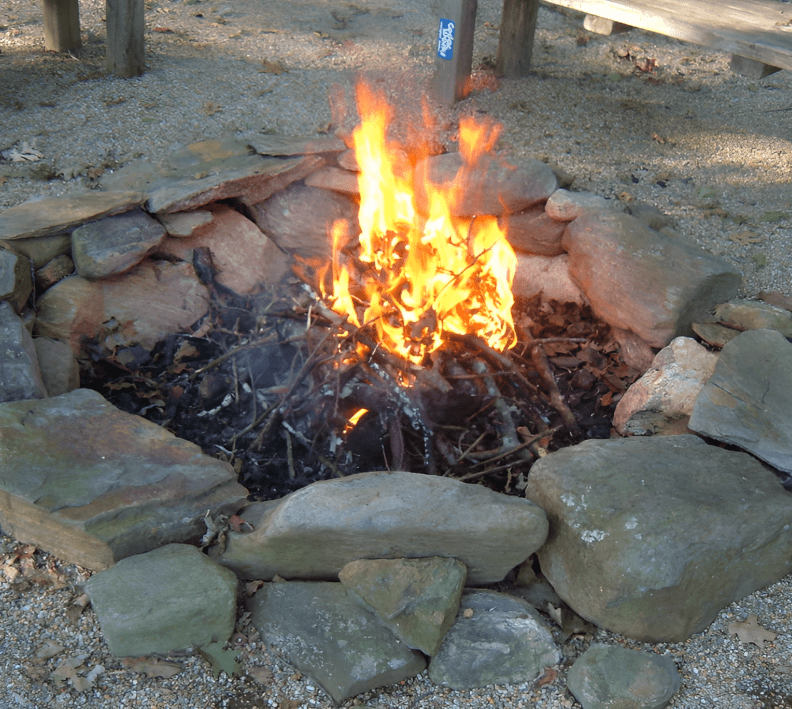
Building Your Own Fire Pit
In remote areas without designated pits, you’ll need to construct one. Here’s a detailed process:

- Choose a Safe Spot: Select a flat area, following the location guidelines above, to ensure stability and safety.
- Dig a Shallow Pit: Use a shovel or trowel to dig a pit 6–8 inches deep and 2–3 feet wide. This size accommodates most campfires while keeping them manageable. We recommend the SOG Entrenching Tool, a compact folding shovel ideal for digging fire pits and campsite cleanup.
…Using a shovel or trowel, dig a shallow pit, about 6–8 inches deep and 2–3 feet wide, to contain your fire. We recommend the SOG Entrenching Tool, a compact folding shovel ideal for digging fire pits and campsite cleanup. - Gather Dry Rocks: Collect medium to large rocks that are stackable and free of moisture. Avoid river rocks, as trapped water can cause them to crack or explode when heated—a safety lesson learned from our backcountry trips.
- Construct a Fire Ring: Arrange the rocks in a circle around the pit, stacking them 2–3 feet high to contain flames and embers. Ensure the ring is tight to prevent gaps where sparks could escape.
Pro Tip: Test rock dryness by tapping them; a hollow sound may indicate moisture. Always prioritize safety to avoid dangerous mishaps.
Gathering Firewood: Tinder, Kindling, and Fuel Wood
A campfire’s success hinges on the right materials: tinder, kindling, and fuel wood. Each type plays a distinct role in igniting and sustaining your fire, and sourcing them responsibly is key to minimizing environmental impact. We strongly recommend bringing your own firewood, as advised by the Don’t Move Firewood campaign, to prevent the spread of invasive pests that can devastate forests. If you must gather wood, our team’s experience in sustainable camping guides the following approach.
Tinder, the spark-catching material, includes dry birch bark, pine needles, or shredded cedar bark—small, flammable items that ignite easily. Look for tinder under tree canopies where it stays dry, especially in wet conditions.
Kindling, pencil-sized sticks or twigs, should come from dead, fallen branches of hardwood trees like oak or maple, as green wood burns poorly and creates excessive smoke.
Fuel wood, the backbone of your fire, consists of wrist-sized or larger logs, ideally hardwoods like birch or ash for a clean, long-lasting burn. Avoid softwoods like pine, which spark heavily and increase wildfire risk.

When gathering, collect only dead, fallen wood, and check local regulations, as some areas prohibit it to protect ecosystems. If purchasing firewood, buy locally—within 10 miles of your campsite—to avoid introducing pests, a practice we’ve followed in national forests to preserve biodiversity.
For reliable ignition, especially in damp conditions, a fire starter can make all the difference. We love the Weber FireStarters for their quick ignition and portability, perfect for any camping trip.
Step-by-Step Guide to Building a Campfire
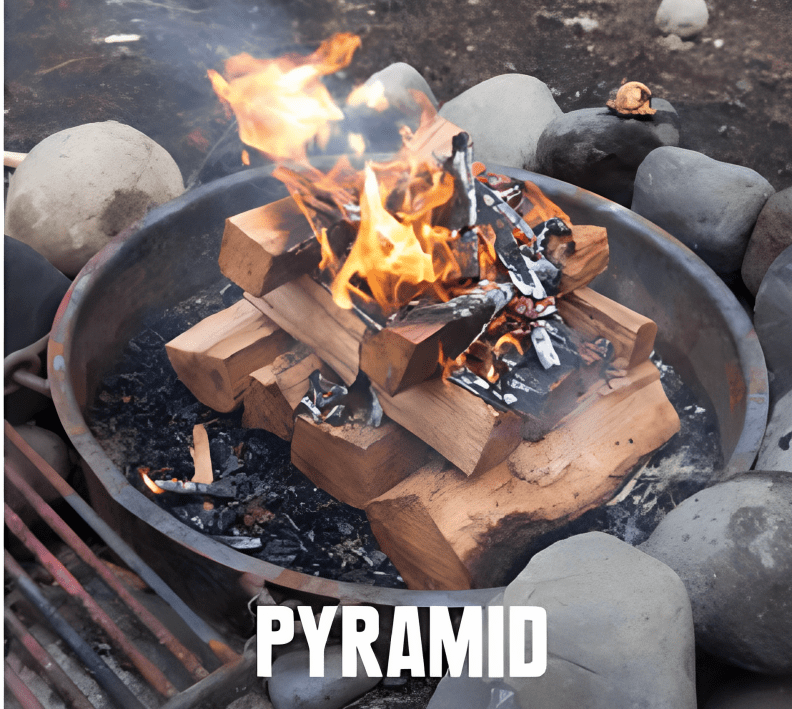
With your materials ready, it’s time to build a campfire using a structure that optimizes airflow and ignition. Our team has tested various methods across diverse conditions, and two stand out for their reliability and ease: the teepee and log cabin structures. These campfire building techniques cater to different needs, whether you’re seeking quick warmth or a stable cooking fire.
Teepee Fire Structure
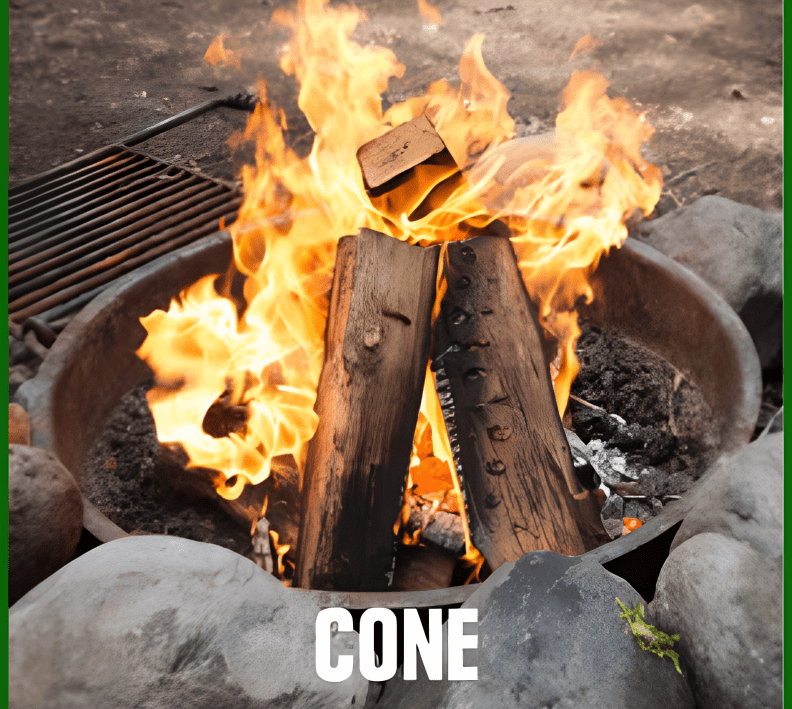
The teepee fire is a beginner-friendly choice, ideal for quick ignition and warmth. Its conical shape channels airflow, helping flames spread rapidly from tinder to fuel wood. Start by placing a golf-ball-sized pile of tinder—such as dry grass or birch bark—in the center of your fire pit.
Around this, lean 6–8 pieces of kindling in a cone shape, ensuring they’re evenly spaced with a small opening on one side for lighting. Next, arrange 3–4 fuel logs around the kindling, leaning them inward to form a teepee. Keep the logs loose to allow oxygen flow, a trick we’ve used in windy alpine campsites to maintain a steady burn. This structure ignites quickly and burns hot, perfect for evening warmth or small gatherings.
Log Cabin Fire Structure
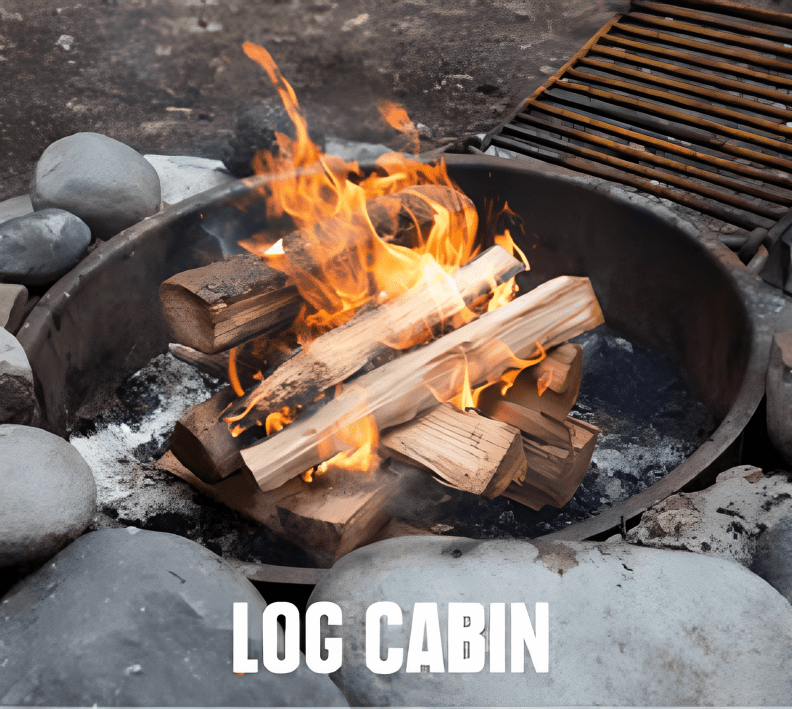
For cooking or long-lasting fires, the log cabin structure offers stability and consistent heat. For campsites with fire restrictions, a portable fire pit like the Solo Stove Ranger 2.0 offers a smokeless, eco-friendly alternative that’s easy to set up.
Begin with a compact tinder pile in the pit’s center. Lay two fuel logs parallel on either side, about 6–8 inches apart, to form the base. Stack two more logs perpendicular on top, creating a square.
Add 1–2 additional layers, alternating directions, to build a stable “cabin.” Place kindling inside the square, leaning slightly to promote airflow. This structure, tested during our multi-day backcountry trips, burns evenly and produces coals ideal for cooking. Its design ensures longevity, making it a favorite for campers needing a reliable fire for hours.
Expert Tip: For cooking, use the log cabin structure and wait for coals to form, as they provide consistent heat compared to flames.
Lighting Your Campfire Safely
Lighting a campfire requires precision to ensure safety and success, especially in challenging conditions like rain or wind. Our team’s experience across diverse environments informs this approach. Use a long-neck lighter or waterproof matches to keep your hands at a safe distance—short matches risk burns, particularly in gusty weather.

Ignite the tinder in multiple spots, focusing on the base where it’s most flammable, until small flames appear. If the kindling doesn’t catch, gently blow at the base to supply oxygen, a technique we’ve perfected in damp forests.
As the kindling ignites, add fuel wood gradually, starting with smaller logs to avoid smothering the fire. Space the logs to maintain airflow, ensuring a steady burn. Keep the fire within the pit’s boundaries—typically 2–3 feet in diameter—to prevent sparks or uncontrolled spread.
In wet conditions, carry a waterproof fire starter, like a magnesium stick or wax-soaked dryer lint, a trick we’ve relied on during rainy coastal campsites. Monitor the fire closely, adding logs as needed to reach your desired size while keeping safety first.
Building a Campfire in Unique Scenarios
Camping conditions vary, and adapting your fire-building skills ensures success in any environment. Below, we address two common scenarios to help you build a campfire with confidence.
Campfire in a Fire Pit
How to build a campfire in a fire pit follows the same principles but demands extra care due to the pit’s fixed structure. Use the campsite’s metal or stone pit, ensuring it’s free of debris like old ashes or twigs, which can cause uneven burning. Spread any existing coals with a shovel for a flat base, a step we’ve found reduces smoke in national park campgrounds.
Choose the teepee or log cabin structure, but keep the fire smaller to fit the pit’s dimensions—typically 2–3 feet wide. If the pit has a grate, position logs to avoid blocking it, ensuring safe cooking. This approach maximizes efficiency and minimizes sparks, making it ideal for family-friendly campsites.
Campfire on Snow or Wet Ground
Building a campfire on snow or wet ground requires preparation to prevent the fire from sinking or extinguishing. Create a raised platform using green logs, sturdy branches, or a metal firepan to elevate the fire above moisture. Clear snow to expose the ground if possible, as this maintains stability.
Use double the amount of tinder—such as dry pine needles or commercial fire starters—to combat dampness, and store it in a waterproof bag. Keep a steady supply of dry fuel wood, ideally brought from home, to sustain the fire. During winter camping in the Rockies, our team used this method to keep fires burning despite heavy snow, ensuring warmth and morale.
How to Put Out a Campfire Safely
Extinguishing a campfire thoroughly is critical to prevent wildfires and ensure campsite safety. Our field-tested method, aligned with NFPA guidelines, includes:
- Plan Ahead: Stop adding fuel wood 30–60 minutes before you plan to extinguish the fire, allowing it to burn down to coals. This reduces the effort needed to put it out.
- Douse with Water: Pour a bucket or gallon of water over the coals, stirring with a stick or shovel to ensure even coverage. Avoid flooding to minimize environmental impact. The Coghlan’s Folding Bucket is a lightweight, packable option for carrying water to extinguish your campfire safely.
- Check for Heat: Hover the back of your hand 3–4 inches above the coals to detect residual heat. If warm, add more water and stir until cool to the touch.
- Verify Completion: Inspect the pit to ensure no hot embers or coals remain. A single ember can reignite, a risk we’ve mitigated in countless campsites.
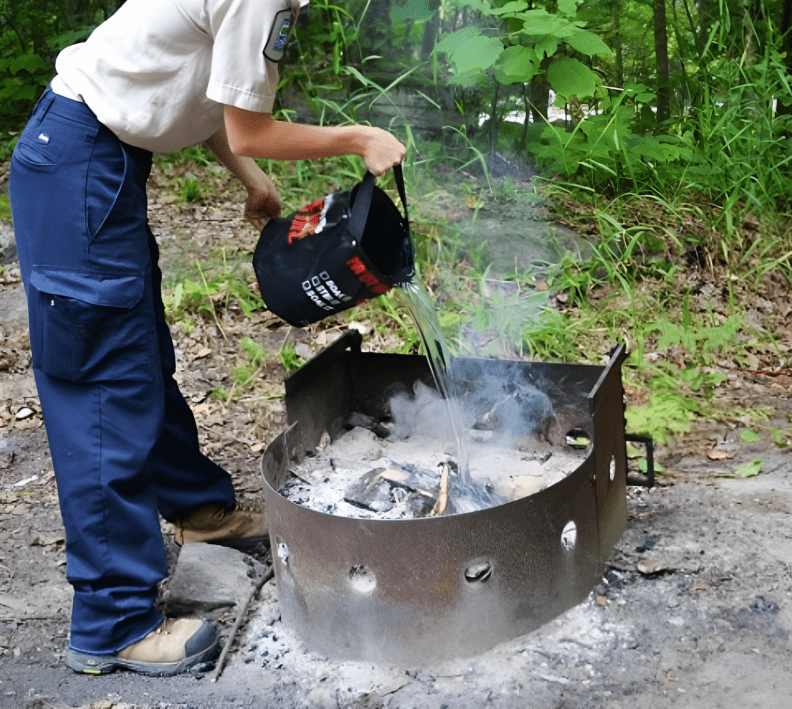
Pro Tip: If water is scarce, use dirt or sand to smother the coals, but always verify coolness before leaving
Essential Campfire Safety Tips
Safety is the cornerstone of building a campfire, protecting lives, property, and nature. Our expertise, backed by the National Fire Protection Association, informs these critical guidelines:
- Verify fire restrictions before building, using resources like campsite signage or the U.S. Forest Service website.
- Keep a bucket of water, sand, or a fire extinguisher nearby for emergencies, a habit we’ve maintained in every campsite.
- Avoid campfires in winds over 15 mph to prevent spark spread; use a windbreak if needed.
- Never leave a fire unattended, even briefly, and extinguish it fully before sleeping or leaving.
- Place tents and gear 15–30 feet from the fire, adjusting for wind direction to avoid smoke or sparks.
- Educate your group, especially children, on fire safety rules to ensure collective responsibility.
Frequently Asked Questions About Building a Campfire
To address common camper concerns, we’ve compiled answers based on our extensive outdoor experience.
Cleaning Up Responsibly
Leaving no trace preserves campsites for future visitors, a principle we’ve upheld across countless trips, guided by Leave No Trace. If you built a fire pit, scatter the rocks naturally across the site, blending them with the environment to avoid unnatural piles. Using a shovel, scoop ashes and coals into a garbage bag for removal, minimizing impact on soil and plants.

If disposal isn’t feasible, disperse ashes thinly over a wide area, away from water sources. Fill in any dug pits with soil, covering with natural debris like leaves or pine needles to restore the site’s appearance. Check for leftover tinder or trash to ensure the area looks untouched. Carrying a small trowel, as we do, simplifies digging and cleanup, reducing your carbon footprint and supporting sustainable camping.
Conclusion
Mastering how to build a campfire elevates your camping adventure, offering warmth, meals, and memories under the stars. With our expert guide, backed by years of outdoor experience and authoritative sources, you’re ready to build a campfire safely and sustainably, whether in a fire pit or on snow.
Try these campfire building techniques on your next trip, and share your tips in the comments below! For more camping insights, check out our guides on Choosing the Best Camping Gear or Camping Hygiene.
Hey, Jack here. I’m hooked on your website’s content – it’s informative, engaging, and always up-to-date. Thanks for setting the bar high!